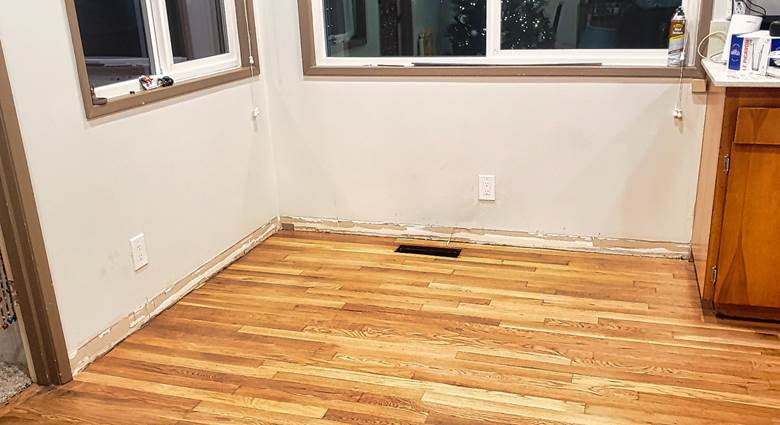
My daughter’s (and her new husband’s) house has a breakfast nook, and my sister-in-law (who has an amazing eye for decorating) suggested that I build a banquette for it. Within a week of finishing the pantry, I started designing and building it. I had no written plans and they weren’t certain what they wanted, but I figured that a basic L shape would fit nicely and that I could include drawers for storage. They also agreed that we could paint it, which means that I could use wood filler to make up for lack of woodworking skills.
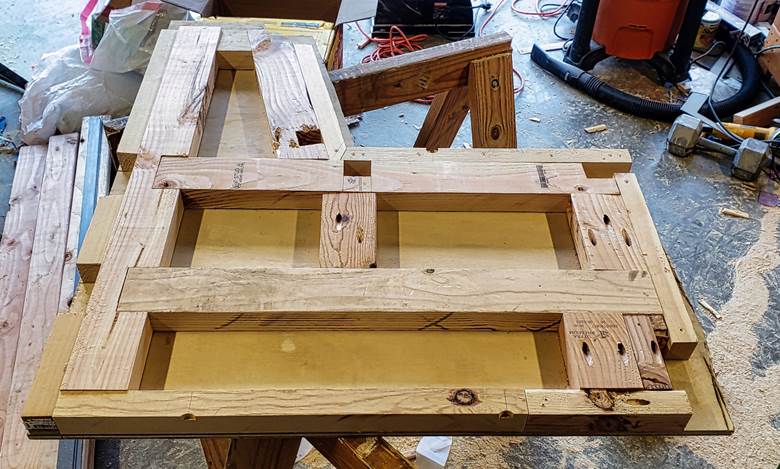
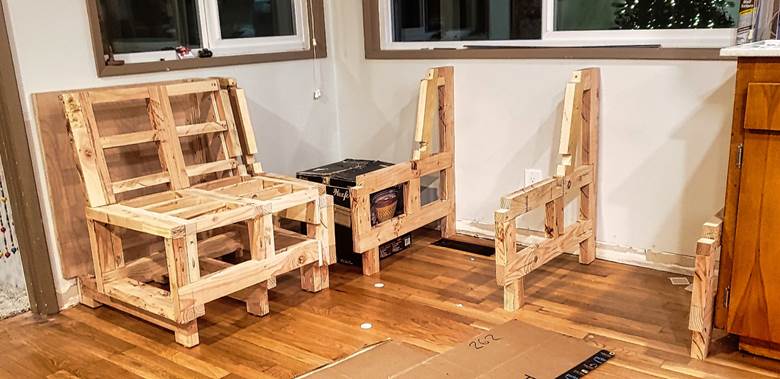
I took basic dimensions from a kitchen chair to get started, and I built a wood template so that every support would be identical.
Shortly after I got started, my daughter sent me this picture and asked if I could do something similar.
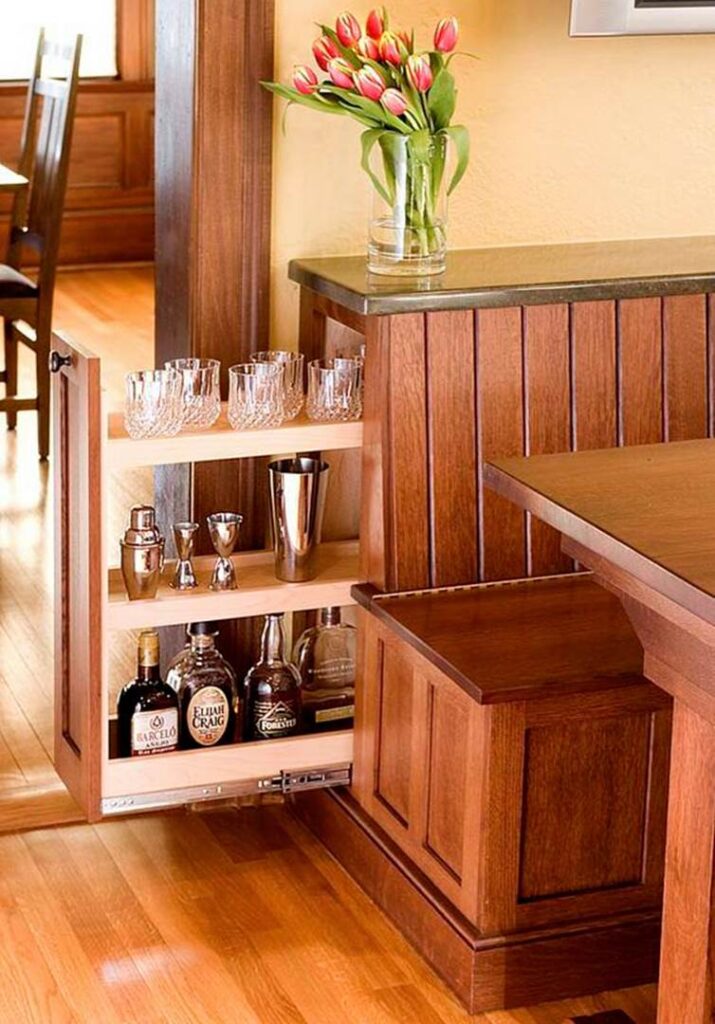
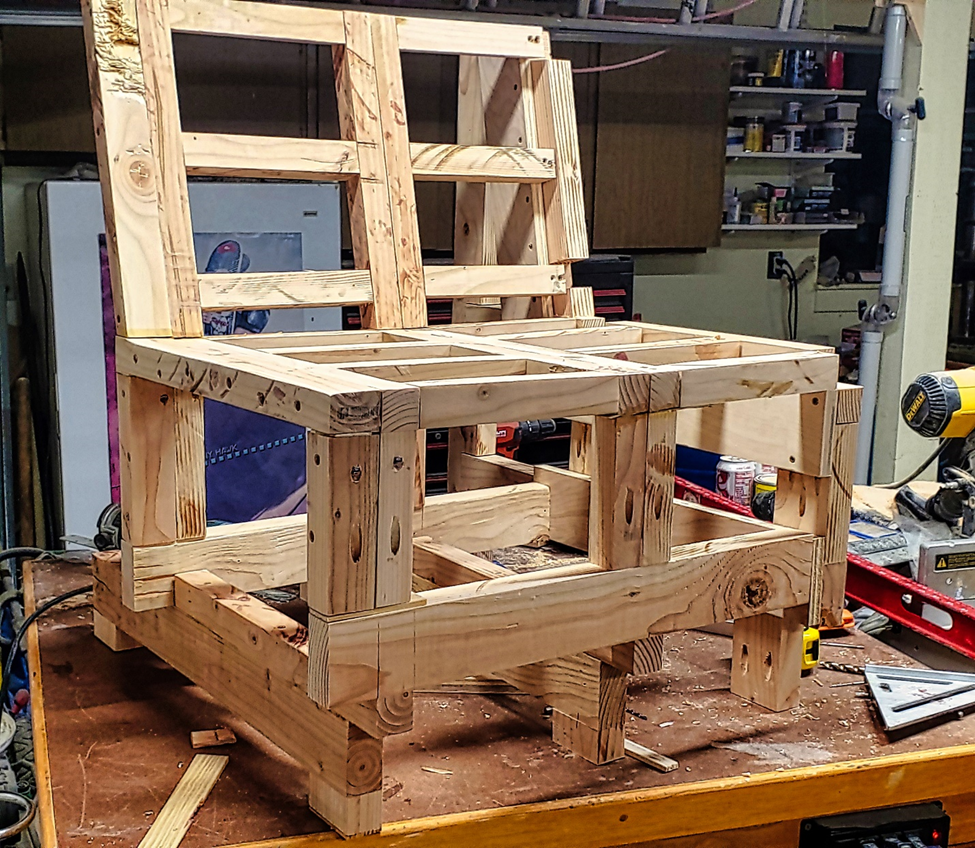
I love a challenge, so I agreed (which forced me to change my above template). She then thought that it would be great if the seat portion also had a drawer that slid out of the side (rather than from the front). This forced me to rethink the support system (and to add a little steel to the construction), but I started on the end with the side drawers and built this:
When I went to test fit my pieces into the space, however, I noticed two huge problems.
The first problem is that L shape created a huge amount of wasted space – nobody could sit comfortably in that corner.
The second problem was that I added 8″ to accommodate the pull-out bar), but I also added 8″ to the opposite side as well (to keep it symmetrical). This not only wasted space, but also made the banquette extend past the kitchen cabinets
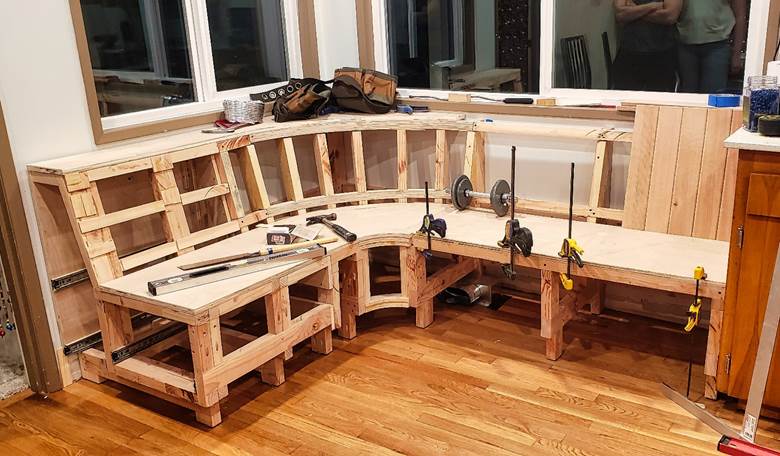
So I decided to embrace the curve (and to re-work my template again).
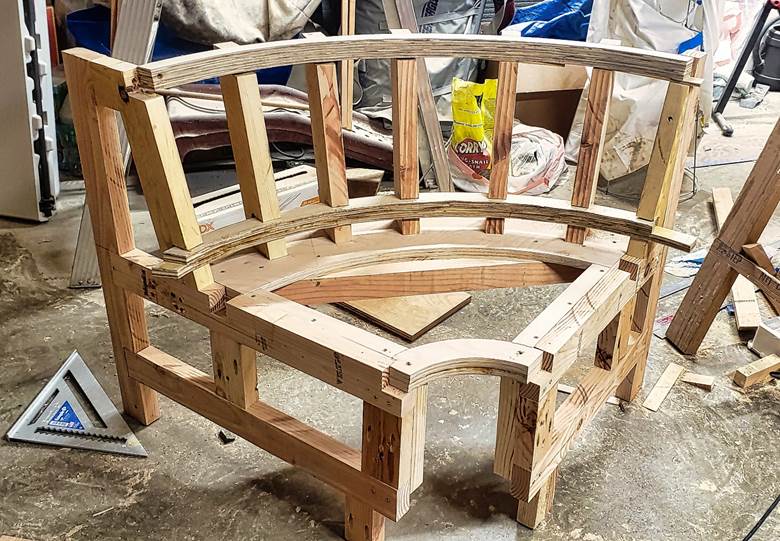
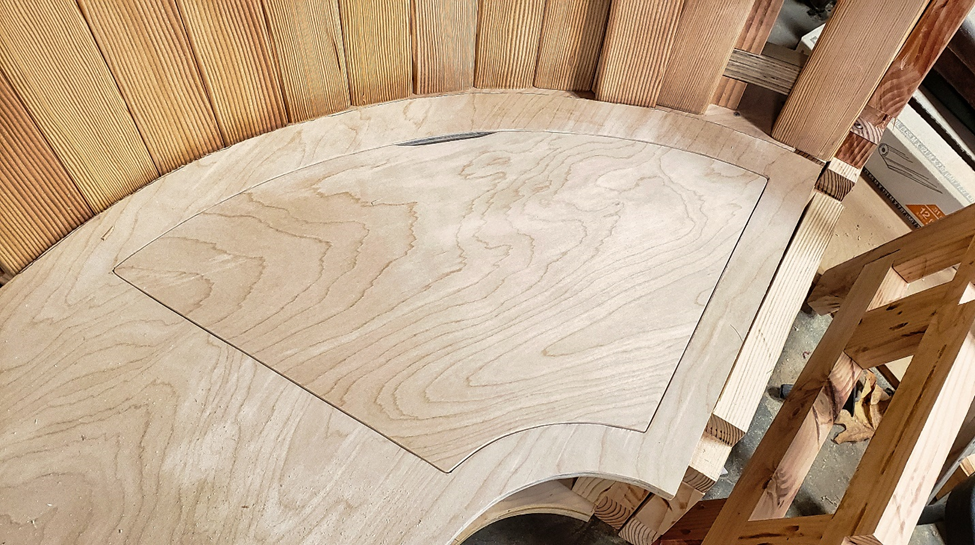
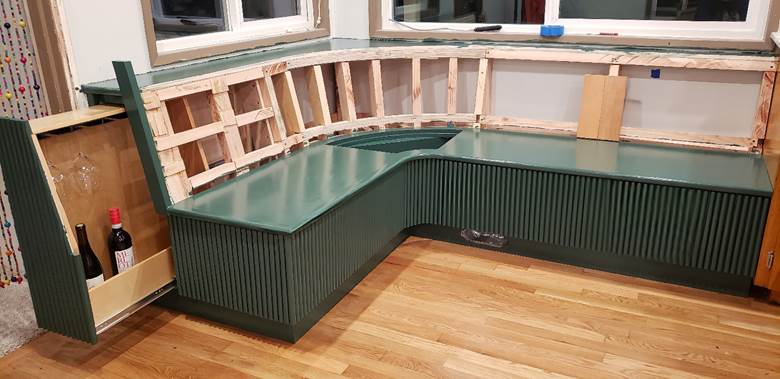
I also built a removable hatch around the curve for more storage.
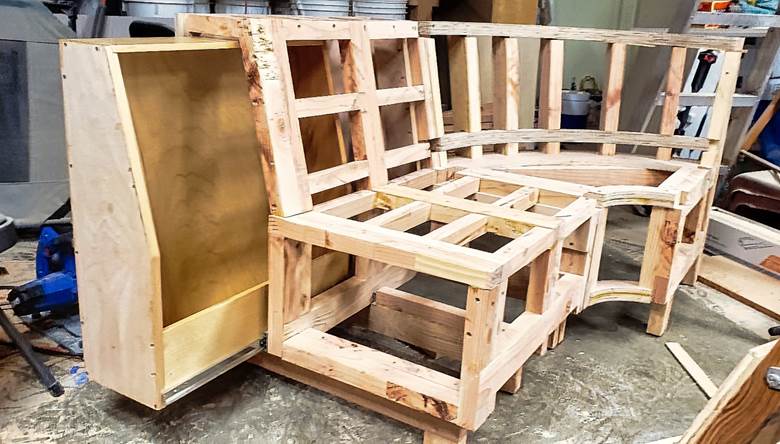
I finally got to the point where I was able to assemble the pieces in her house.
They have a heat vent that the banquette covered, so I found a kit on Amazon especially for re-routing heating vents from under a cabinet.
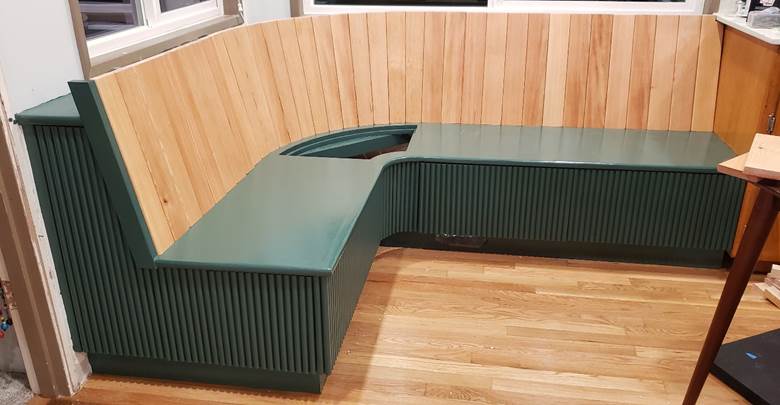
They still hadn’t decided on the outer finish, but they eventually decided that while they are OK painting the bench, they would like the seatback to be natural wood (I ended up using Douglas Fir).
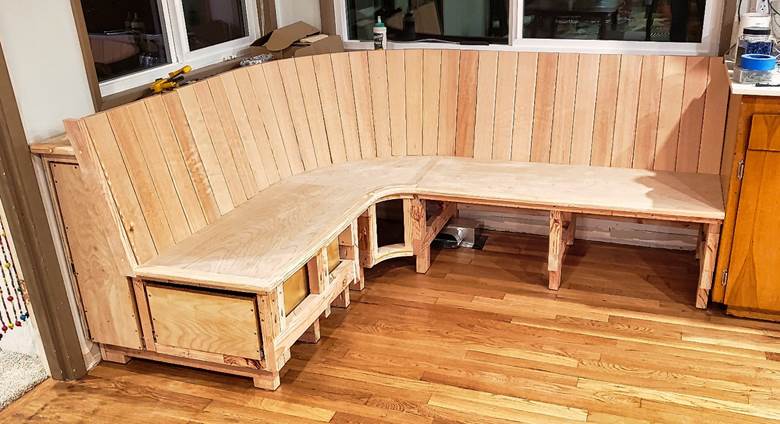
Because I’m a nerd, I thought it would be fun if the drawers were hidden (or at least non-obvious). So I bought a bunch of half-rounded trim from Dunn Lumber and glued them to wood panels that I could easily install.
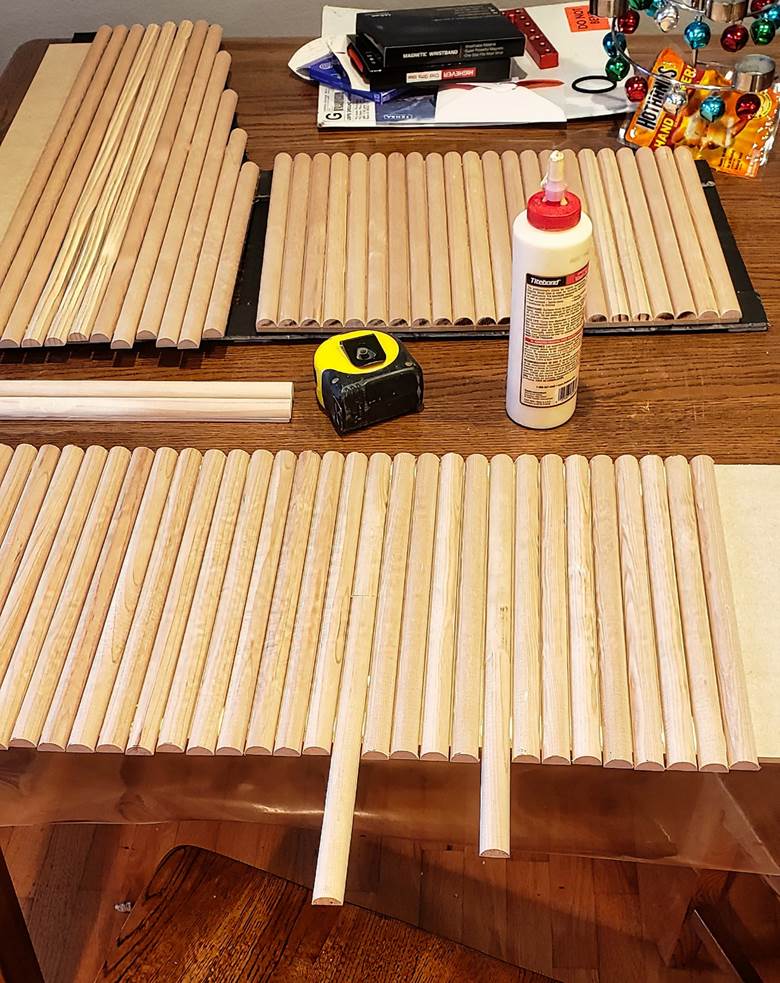
My thinking was that it would be much easier to hide the drawer openings amongst the vertical lines.
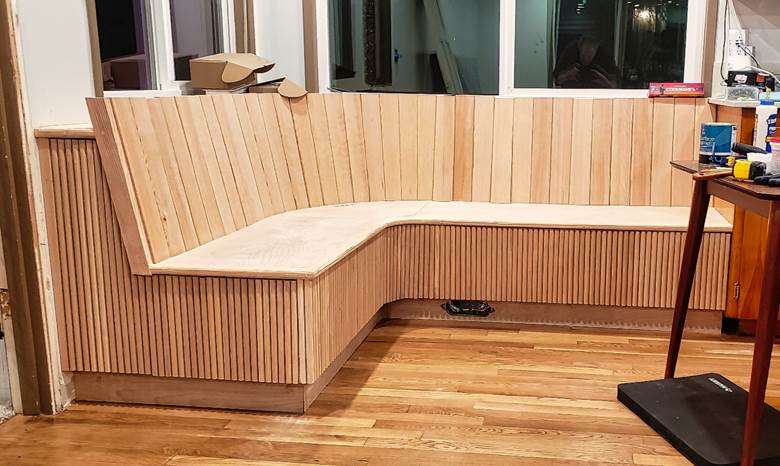
Then it was ready for paint.
And then I stained and installed the Douglas Fir seat backs.
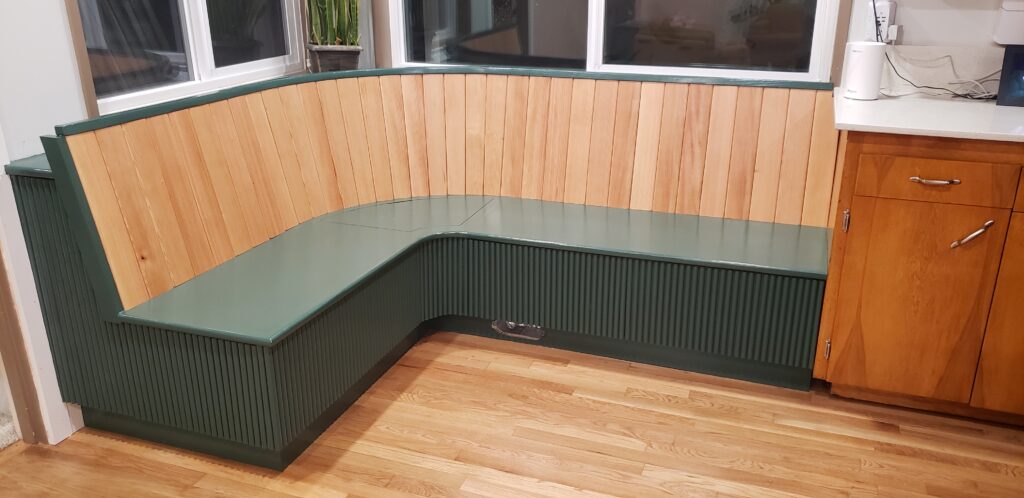
At this point, it was pretty much done, but I thought that it would benefit from a decorative trim on top of the Douglas Fir. I didn’t want to bend wood, so I cut and glued several1 ¼” Douglas Fir strips and shaped it with a jigsaw and a sander.
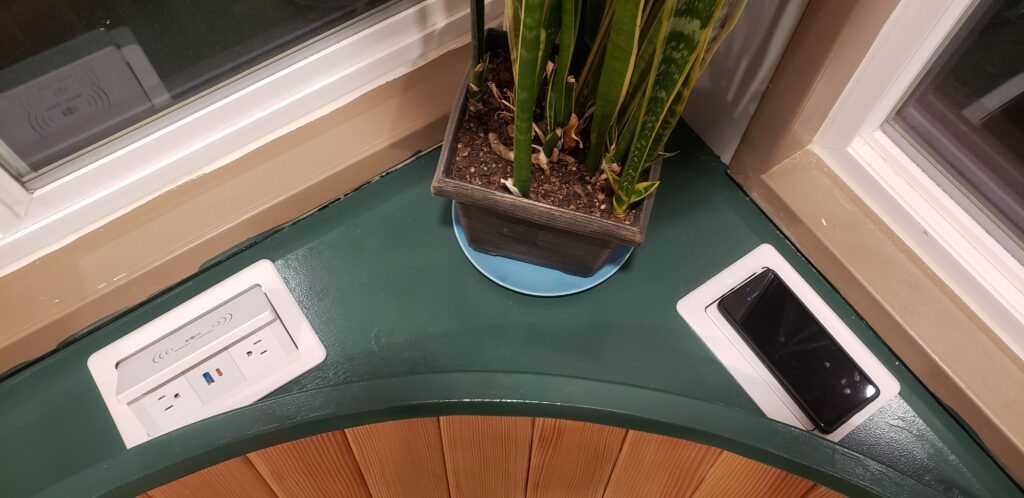
One cool feature is that I installed two pop-up outlets on the back of the banquette that also double as wireless phone chargers.
What do you think of it?

I think that it’s easily the coolest thing that I’ve built yet, and the kids love it! They immediately started hosting dinner parties to show it off, and they challenge everybody to find the hidden drawers.
It only took just over two months to build, but it felt like 6 months (probably much longer to the kids).